Installation
This guide will walk you through the process of setting up the Circuit Parts project on your local machine. It's going to be a little bit of work to signup for few services and setup the environmental variable but it's going to be worth it!
Get yourself a cup of coffee ☕️ and let's get started!
System Requirements
Here is what you need to be able to run Circuit Parts
- Git (opens in a new tab)
- Node.js 18.17 (opens in a new tab) or later.
- npm (opens in a new tab) (recommended)
- macOS, Windows (including WSL (opens in a new tab)), and Linux are supported.
- Code Editor (VSCode (opens in a new tab) recommended)
Project Setup
Follow these steps to set up the project on your local machine:
Forking Repository
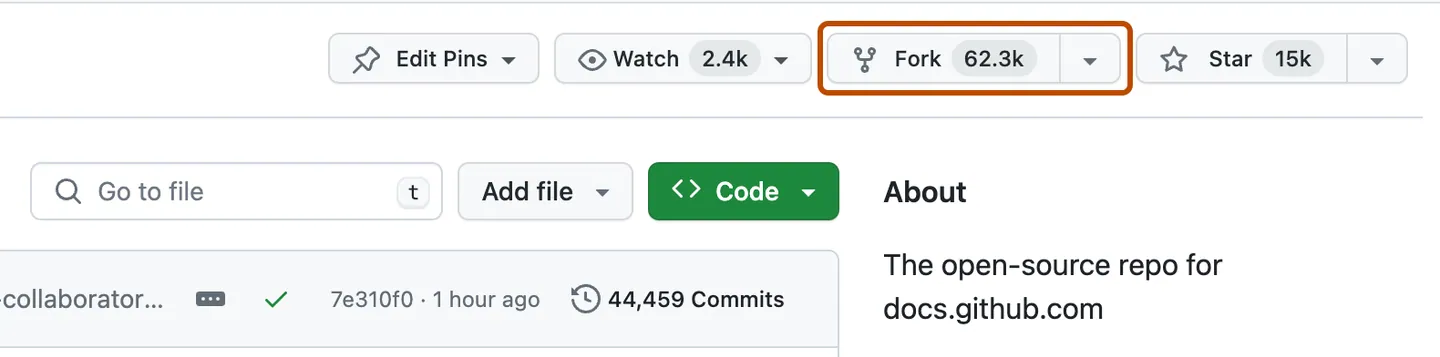
Navigate to the Circuit Parts GitHub repository (opens in a new tab) and click the "Fork" button in the top right corner of the page. This will create a copy of the repository in your GitHub account. See Forking a repository (opens in a new tab) for more information.
Cloning Respository
Clone (opens in a new tab) the repository to your local machine by running the following command in your terminal. This will create a copy of the repository on your local machine.
git clone https://github.com/circuitparts/store.gitInstall Dependencies
Navigate to the project folder and install the required dependencies by running the following command in your terminal.
cd store
npm install
Environment Variables
Setup your environment variables by copying the .env.example file to .env.local and replace the placeholders with the applicable keys. For database and storage setup, see the next sections.
cp .env.example .env.localSetup Database
- Start at the MongoDB Atlas registration page (opens in a new tab) to register for a new Atlas account. Alternatively, you can log in if you already have an account.
- If you are registering for a new account, Atlas creates an organization and project for you. You can also create them on your own.
- With your organization and project created, you can now deploy a free cluster (opens in a new tab) that will be used to store your data.
- Go to the overview page for your project. Click the Create button to create a new cluster.
- Select the M0 option. This is the free tier and will be sufficient for working with this project.
- Choose a cloud provider and region for your cluster. The default options are fine for this project.
- Click the Create button at the bottom of the page to deploy the cluster and The Security Quickstart wizard appears.
- Create a database user by specifying a username and password. Make sure to save the username and password as you will need them later.
- MongoDB will automatically add your IP address to the IP Access List. Alternatively, you can add 0.0.0.0/0 to the list to allow access from any IP address. This is not recommended for production environments.
- Click the Finish and Close button to complete the setup.
- In the overview page, click the Connect button to connect to your cluster. Select any method and copy the connection string. Your connection string should look something like this:
mongodb+srv://<project_name>:<password>@<cluster_name>.<xxxx>.mongodb.net/?retryWrites=true&w=majority - Replace
<password>with the password for the user you created earlier and add it to your.env.localfile.
Setup AWS S3
This project uses AWS S3 for storing design files uploaded by users from the PCB Fabrication Order page:
-
Signup for AWS (opens in a new tab) and follow on-screen instructions to create an account. When you sign up for an AWS account, an AWS account root user is created. The root user has access to all AWS services and resources in the account.
-
(Optinal Setup) Secure your AWS root user by turning on multi-factor authentication (MFA). See Enabling a virtual MFA device (opens in a new tab) for more information. As a security best practice, assign administrative access (opens in a new tab) to an administrative user, and use only the root user to perform tasks that require root user access (opens in a new tab)
-
Open the Amazon S3 console at https://console.aws.amazon.com/s3/ (opens in a new tab).
-
Click the Create bucket button to open the Create bucket wizard.
-
For Region, choose the AWS Region where you want the bucket to reside. Ideally choose a region that is closest to you to reduce latency.
-
In the Bucket name field, enter a unique name for your bucket. The bucket name must be unique across all existing bucket names in Amazon S3. If you receive an error, try a different bucket name.
-
The default settings should be for this project. Just make sure under Object Ownership, ACLs disabled (recommended) is enabled and under Block Public Access settings for this bucket, Block *all*** public access** is enabled.
-
Click Create bucket to create your bucket.
-
Click on the bucket you just created and navigate to the Permissions tab. Click on Cross-origin resource sharing (CORS) and add the following policy in the editor:
[ { "AllowedHeaders": ["*"], "AllowedMethods": ["GET", "POST", "PUT", "DELETE"], "AllowedOrigins": [ "http://localhost:3000", "http://localhost:3000/*", "<optinally_add_your_own_domain_here>" ], "ExposeHeaders": [] } ] -
Click Save to save the policy.
-
Go to Properties tab and in Bucket overview section, copy the Bucket ARN. You will need this to create a policy for the IAM user.
-
Copy the Bucket ARN and Region and add it to your
.env.localfile. -
Create a new IAM user. On the search bar type IAM and click on the IAM service. Click on Users from the left sidebar and click on Create user.
-
Enter a username and click Next
-
Click on Attach existing policies directly and click on Create policy to open a new window. Click on the JSON tab and add the following policy:
{
	"Version": "2012-10-17",
	"Statement": [
		{
			"Sid": "Statement1",
			"Effect": "Allow",
			"Action": ["s3:ListBucket", "s3:DeleteObject", "s3:GetObject", "s3:PutObject"],
			"Resource": ["<your_bucket_arn>"]
		}
	]
}
Replace
<your_bucket_arn>with the Bucket ARN you copied earlier. -
Click Review policy and give your policy a name and description. Click Create policy to create the policy.
-
Go back to the previous window and under Permissions polices section click Refresh icon. Search for the policy you just created and select it. Click Next and then Create user.
-
Review the user details and click Create user.
-
In the users list, click on the user you just created and navigate to the Security credentials tab. Click on Create access key and save the Access key ID and Secret access key. Add these keys to your
.env.localfile. -
Copy the User ARN from the summary tab. You will need this to add it to the bucket policy.
-
Go back to the Permissions tab of your bucket and click on Bucket policy. Add the following policy in the editor:
{
	"Version": "2012-10-17",
	"Statement": [
		{
			"Sid": "Statement1",
			"Effect": "Allow",
			"Principal": {
				"AWS": ["<your_user_arn>"]
			},
			"Action": ["s3:ListBucket", "s3:DeleteObject", "s3:GetObject", "s3:PutObject"],
			"Resource": ["<your_bucket_arn>", "<your_bucket_arn>/*"]
		}
	]
}
Replace
<your_user_arn>with the User ARN you copied earlier and<your_bucket_arn>with the Bucket ARN you copied earlier. Take a close look at the Resource field. It should have the bucket ARN and the bucket ARN with/*at the end. -
Click Save to save the policy.
-
You have successfully setup your S3 bucket. Add the Access key ID, Secret access key, Bucket name, Region and Bucket ARN to your
.env.localfile.
Building
- Build the project by running the following command in your terminal. This will create a development build of the project and start the development server.
npm run build-
Open http://localhost:3000 (opens in a new tab) with your browser to see the result.

You should see the Circuit Parts homepage. If you see this, congratulations! You have successfully setup the project on your local machine.
If you see any errors, please refer to the Troubleshooting section.
Uff! That was a lot of work but you did it! Congratulations 🎉
VS Code Setup
This project is best developed using Visual Studio Code (opens in a new tab). It is a lightweight but powerful source code editor which runs on your desktop and is available for Windows, macOS and Linux.
For the best experience, we recommend installing the following extensions:
- ESLint (opens in a new tab) - Integrates ESLint JavaScript into VS Code.
- Prettier (opens in a new tab) - Code formatter using prettier.
- Tailwind CSS IntelliSense (opens in a new tab) - Intelligent Tailwind CSS tooling for VS Code.
- MongoDB for VS Code (opens in a new tab) - MongoDB extension for VS Code.
- Playwright Test (opens in a new tab) - Playwright Test extension for VS Code.
Troubleshooting
- Invalid environment variables
- If you see this error, make sure you have copied the
.env.examplefile to.env.localand replaced the placeholders with the applicable keys. Read the above instructions carefully and make sure you have followed all the steps.
- If you see this error, make sure you have copied the
- MongoDB connection failed
- If you see this error, make sure you have replaced the placeholders in the
.env.localfile with the correct connection string. Make sure you have followed the Database Setup section carefully.
- If you see this error, make sure you have replaced the placeholders in the
- AWS S3 connection failed
- If you see this error, make sure you have replaced the placeholders in the
.env.localfile with the correct keys. Make sure you have followed the AWS S3 Storage Setup section carefully.
- If you see this error, make sure you have replaced the placeholders in the
- Build failed
- If you see this error, make sure you have installed the required dependencies by running the
npm installcommand in the project folder. Make sure you have followed the Project Setup section carefully.
- If you see this error, make sure you have installed the required dependencies by running the
- Page not found
- If you see this error, make sure you have started the development server by running the
npm run buildcommand in the project folder and opened http://localhost:3000 (opens in a new tab) with your browser. This project is setup to run on port 3000 by default. If you have changed the port, make sure to open the correct port in your browser.
- If you see this error, make sure you have started the development server by running the
- Other errors
- If you see any other errors, please raise an issue in the Issues tab (opens in a new tab). But before you do that, make sure to check if the issue has already been raised by someone else. If it has, please add a comment to the existing issue instead of creating a new one.
We will keep updating this guide with more troubleshooting tips as we come across more issues.